How to create and add signatures in Outlook
15 May 2024

Contents of article
- How to create a signature in Outlook
- How to add a signature in Outlook for Mac
- How to add a signature in Outlook.com
- How to add images to Outlook email signatures
- How to automatically add signatures to Outlook
- How to add a signature on Outlook365 mobile
- Outlook signature best practices
- Using Exclaimer for centrally managing signatures in Outlook
- Frequently asked questions about signatures in Outlook
Adding a professional email signature to Outlook business profiles is simple to do and will have a positive impact on your external communications.
Using a professional Outlook email signature promotes your brand in a positive manner while providing recipients with your contact information.
This article showcases how to setup and create client-side email signatures in Outlook. The native functionality of Outlook 2019 (and Outlook 2016) allows you to create a signature design to personalize your emails with your contact details.
How to create a signature in Outlook
Creating email signatures in Outlook is simple and allows for all the important aspects of a professional signature to be included.
However, the signature editor in Outlook is fairly basic, only offering simple formatting options. This limits how elaborate you can make your email signature design.
Follow our guide below to learn how to create a signature in Outlook.
- Open Outlook from Windows using either the "Start" menu or the taskbar.
- In Outlook, do one of the following:
- Click the gear icon "(Settings)" in the top right, and navigate to "View all Outlook settings".


- Open a new email and click "Signature" > "Signatures…"
- Click the gear icon "(Settings)" in the top right, and navigate to "View all Outlook settings".
- Before you start to create your Outlook email signature, ensure your email address is correct under "Choose default signature".
- Under "Email signature", click "New". Enter a name for your Outlook signature template.
- Under "Edit signature", create your email signature. You’ll be able to change the font type, colors, size, and text alignment.
- To use added formatting like bullets, tables, and borders, you’ll need to do this in Microsoft Word. You’ll then need to copy and paste the text into the "Edit signature" box.
To add an image like a company logo, select the "Image" icon, find your image file, and click "Insert".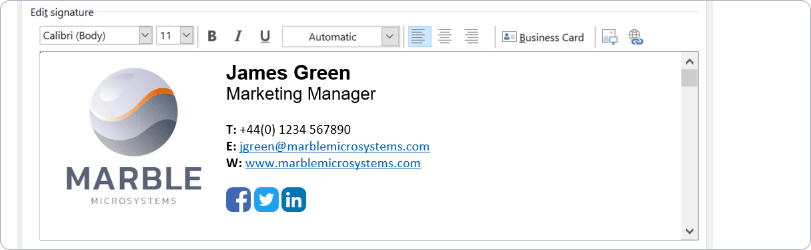
- Assign your signature in Outlook to new messages, replies, or forwards.

- Click "OK" to save your email signature. Your new signature will now automatically be included to all outgoing messages.
How to add a signature in Outlook for Mac
Open Outlook for Mac: Go to the top menu bar, click "Outlook", and select "Preferences".
In the Outlook Preferences window, under the Email section, select "Signatures".
Click the "+" button, name your signature, and customize it in the right pane.
Use the drop-down menus next to "New messages" and "Replies/forwards" to select your signature preferences.
Close the Outlook Preferences window, and you're done.
How to add a signature in Outlook.com
- Open Outlook.com
- Click on "Settings" (the gear icon).

- Click "View all Outlook settings" from the message menu:
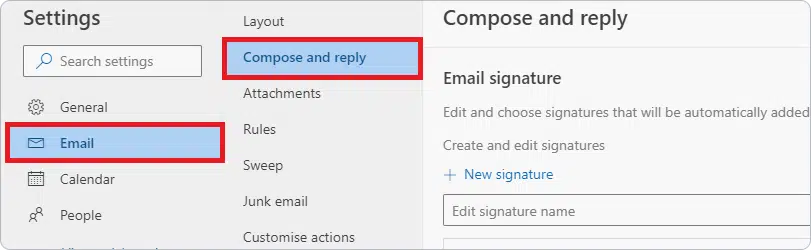
- In the "Settings" window, select "Email" and then "Compose and reply".
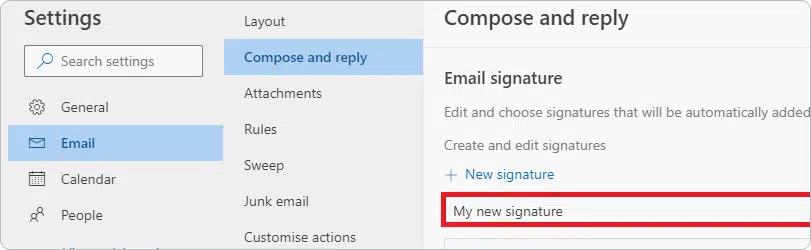
- Click "New Signature" and create your template.
- Choose how you want your signature to appear in emails. You can set it for new messages, replies, forwards, or all of the above.

- Click "Save".
How to add images to Outlook email signatures
Images in professional email signatures draw the recipient’s eye to your template. This might be a company logo or a marketing banner advertising a new offer, service, or promotion.
To add images to email signatures in Outlook, do the following:
Open the ‘Signatures’ tool from the "File" > "Options" > "Mail" menu or Signature menu in a new email window. Select the email signature you want to customize.
Select the images icon from the "Edit Signature" panel. This opens the "Image Finder" window. Select your image and click "Insert".
Once your image has been added to your Outlook signature, you can resize it in two simple steps:
Right-click the inserted image and select "Picture".
Select "Size" and edit the image dimensions to change the scale of the picture.
Keep the "Lock aspect ratio" option selected to avoid changing the proportions of the image. This is important when adding a company logo.
How to automatically add signatures to Outlook
In Outlook, you can decide to add email signatures in Outlook to every email or add a unique signature manually with each message.
To auto-populate emails with your default email signature, follow these steps:
Open the "Signatures" tool.
Under "Choose default signature", assign an email address for the signature.
Select a signature to be applied to "New messages" from the drop-down menu.
This automatically applies the chosen signature to all new emails as the default.
To manually apply a chosen signature to an email, choose the "Signatures" tool in a new window. The drop-down menu will show all saved signature templates. Simply select your chosen signature and it will appear in the email box.
How to add a signature on Outlook365 mobile
It’s also possible to create and apply professional email signatures in the Outlook app for Android and iOS devices.
Open the Outlook app and select "Settings" via the gear icon on either iOS or Android.
Select "Signature" from the menu.
On the following screen, enter a new email signature.
Select the "Checkmark" icon in the top right-hand corner to save and apply your new email signature.
The iOS and Android apps for Outlook are more limited than the desktop version, with only text options available.
A common example of an email signature in Outlook for Android is:
Job title
Company name
Street address, ZIP code
Business phone number
Email address
This provides the contact information a recipient needs to contact the sender. While it doesn’t include images or links, it’s an effective placeholder until the sender is back at their desktop.
Outlook signature best practices
To ensure your Outlook signature makes the right impression, consider the following best practices:
Keep it simple: A signature in Outlook that looks cluttered can be overwhelming. Stick to essential information like your name, position, company, and contact details.
Use professional fonts: Choose fonts that are easy to read and professional. Standard fonts like Arial, Calibri, or Times New Roman are safe bets.
Include social media: If relevant, include links to your professional social media profiles. Make sure these links are up-to-date and lead to profiles you’re comfortable sharing with all recipients.
Optimize images: If you include an image or logo in your Outlook signature, ensure it’s high quality but optimized for size to prevent it from unnecessarily increasing email load times.
Mobile responsiveness: Test your signature in Outlook on multiple devices to ensure it looks good on desktops, tablets, and smartphones.
Standardize across the team: If you’re managing a team, consider creating a standardized template for everyone to use. This promotes brand consistency.
Using Exclaimer for centrally managing signatures in Outlook
Learning how to change an email signature in Outlook is simple and doesn’t usually pose an issue for employees. However, signature templates are difficult to manage across all users. Without central control, end users can update their signatures in Outlook as and when they want. This can hurt your brand reputation.
The best way to add and update signatures in Outlook is to use Exclaimer’s email signature software. It lets you easily design and control Outlook signatures that are automatically applied to all users.

All you need to use Exclaimer’s email signature solution is for your local Active Directory to be synchronized and configured with Azure AD. The product can also be seamlessly migrated to Microsoft 365 (Office 365) at a later date.
See today how Exclaimer fires up Outlook email signature management and get yourself a free trial.