



Dave is a marketing expert with 15 years experience in the tech and SaaS world. He specializes in educating IT and channel audiences, with a focus on security, privacy, compliance, and marketing technology. With a talent for storytelling and a deep understanding of the industry, Dave transforms complex IT topics into clear, engaging, and impactful narratives.
10 essential Outlook rules to increase your productivity
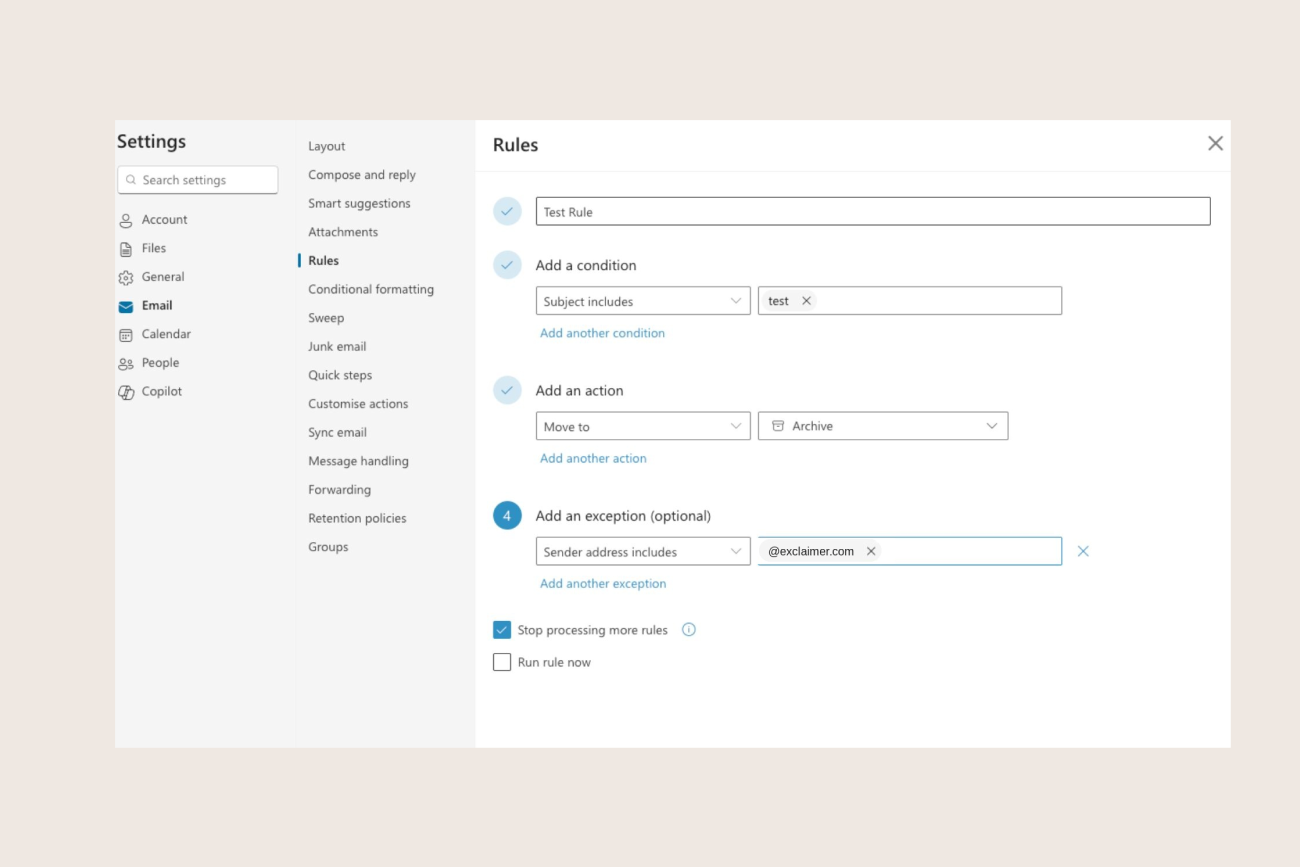
TL;DR
Outlook rules automate sorting, flagging, categorizing, and auto-replying inside a single mailbox. The 10 most useful ones, and how to set each up, are below.
They're a personal productivity feature, not a governance tool. The classic rule engine has no action that appends an email signature or disclaimer to outgoing mail.
Enforcing one email signature and disclaimer across an entire organization needs a different tool, covered further down.
Feeling overwhelmed by the never-ending influx of emails in your Outlook inbox? Discover how Outlook rules can help you take control, boost productivity, and never miss an important message again.
In this guide, we'll explore the best Outlook rules to implement and show you how to set them up for maximum efficiency.
What are Outlook rules and how do they work?
Outlook rules are automated actions that can be set up to manage your emails as they come in. They work by applying a set of conditions and actions to incoming emails, allowing you to filter, organize, prioritize, or even delete them automatically.
 For example, you can create a rule that moves all emails from a specific sender directly into a designated folder or marks them as important. This can save you time and effort in manually sorting through your inbox and help you stay on top of important emails.
How to create a rule in Outlook
Creating a rule in Outlook is simple and can be done in just a few steps:
In your Outlook inbox, go to the File tab and select Manage Rules & Alerts.
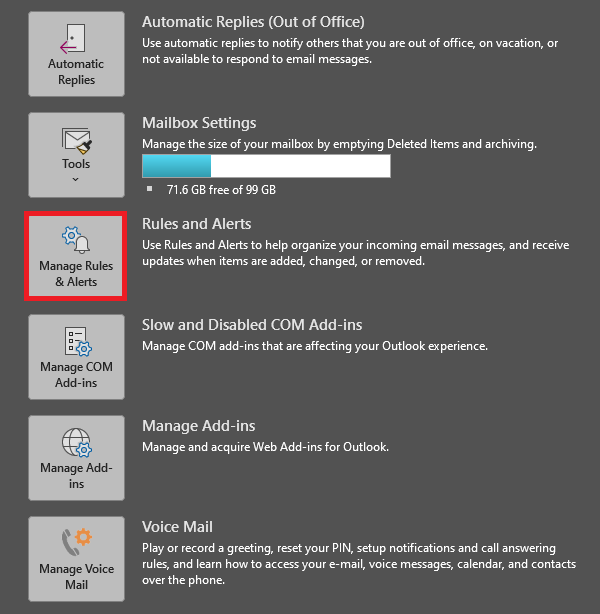
Click on the New Rule button and choose whether you want to apply the rule to all messages or only a specific set of emails.
Next, you can set up the conditions that must be met for the rule to be applied. This can include specific senders, subjects, or even keywords in the body of the email.
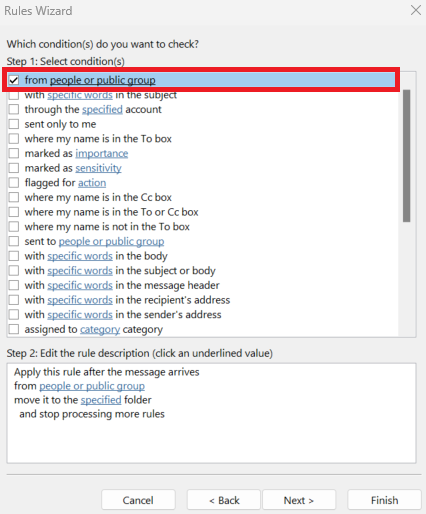
Then, select the action you want the rule to take when these conditions are met. You can choose from a variety of options such as moving emails to a designated folder, forwarding them to another email address, or deleting them.
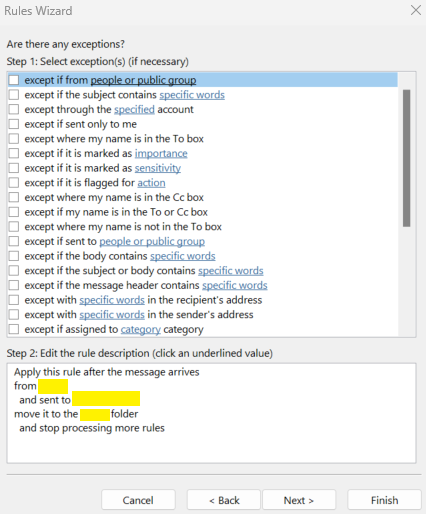
Finally, give your rule a name and click Finish. Your rule will now be applied to all incoming emails that meet the specified conditions.
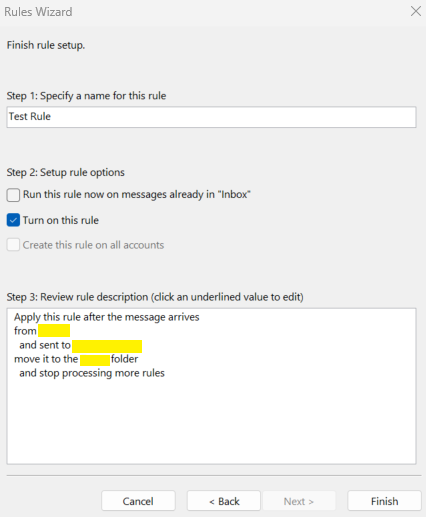
Create a rule in Outlook directly from an email message
To create a rule in Outlook directly from a message, follow these steps:
On Windows (Outlook Desktop App)
Open Outlook and select the email message you want to create a rule for.
Click on the Home tab in the ribbon.
Click Rules (found in the "Move" group).
Select Create Rule from the dropdown menu.
In the "Create Rule" window, choose the conditions you want (e.g., from the sender, subject, or other criteria).
Select the action (e.g., move to a folder, flag, delete).
Click OK, then confirm if you want to Run this rule now.
Click OK again to save the rule.
On Outlook Web (Outlook.com or Microsoft 365)
Open Outlook on the web.
Select the email message.
Click on the three dots (•••) in the toolbar.
Select Rules > Create rule.
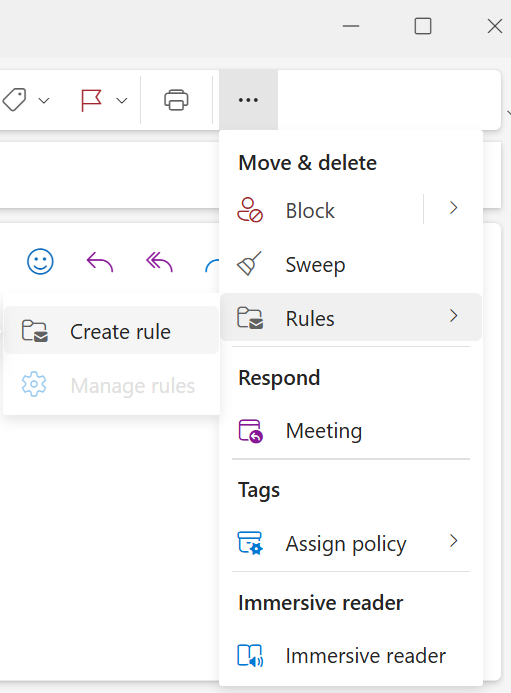
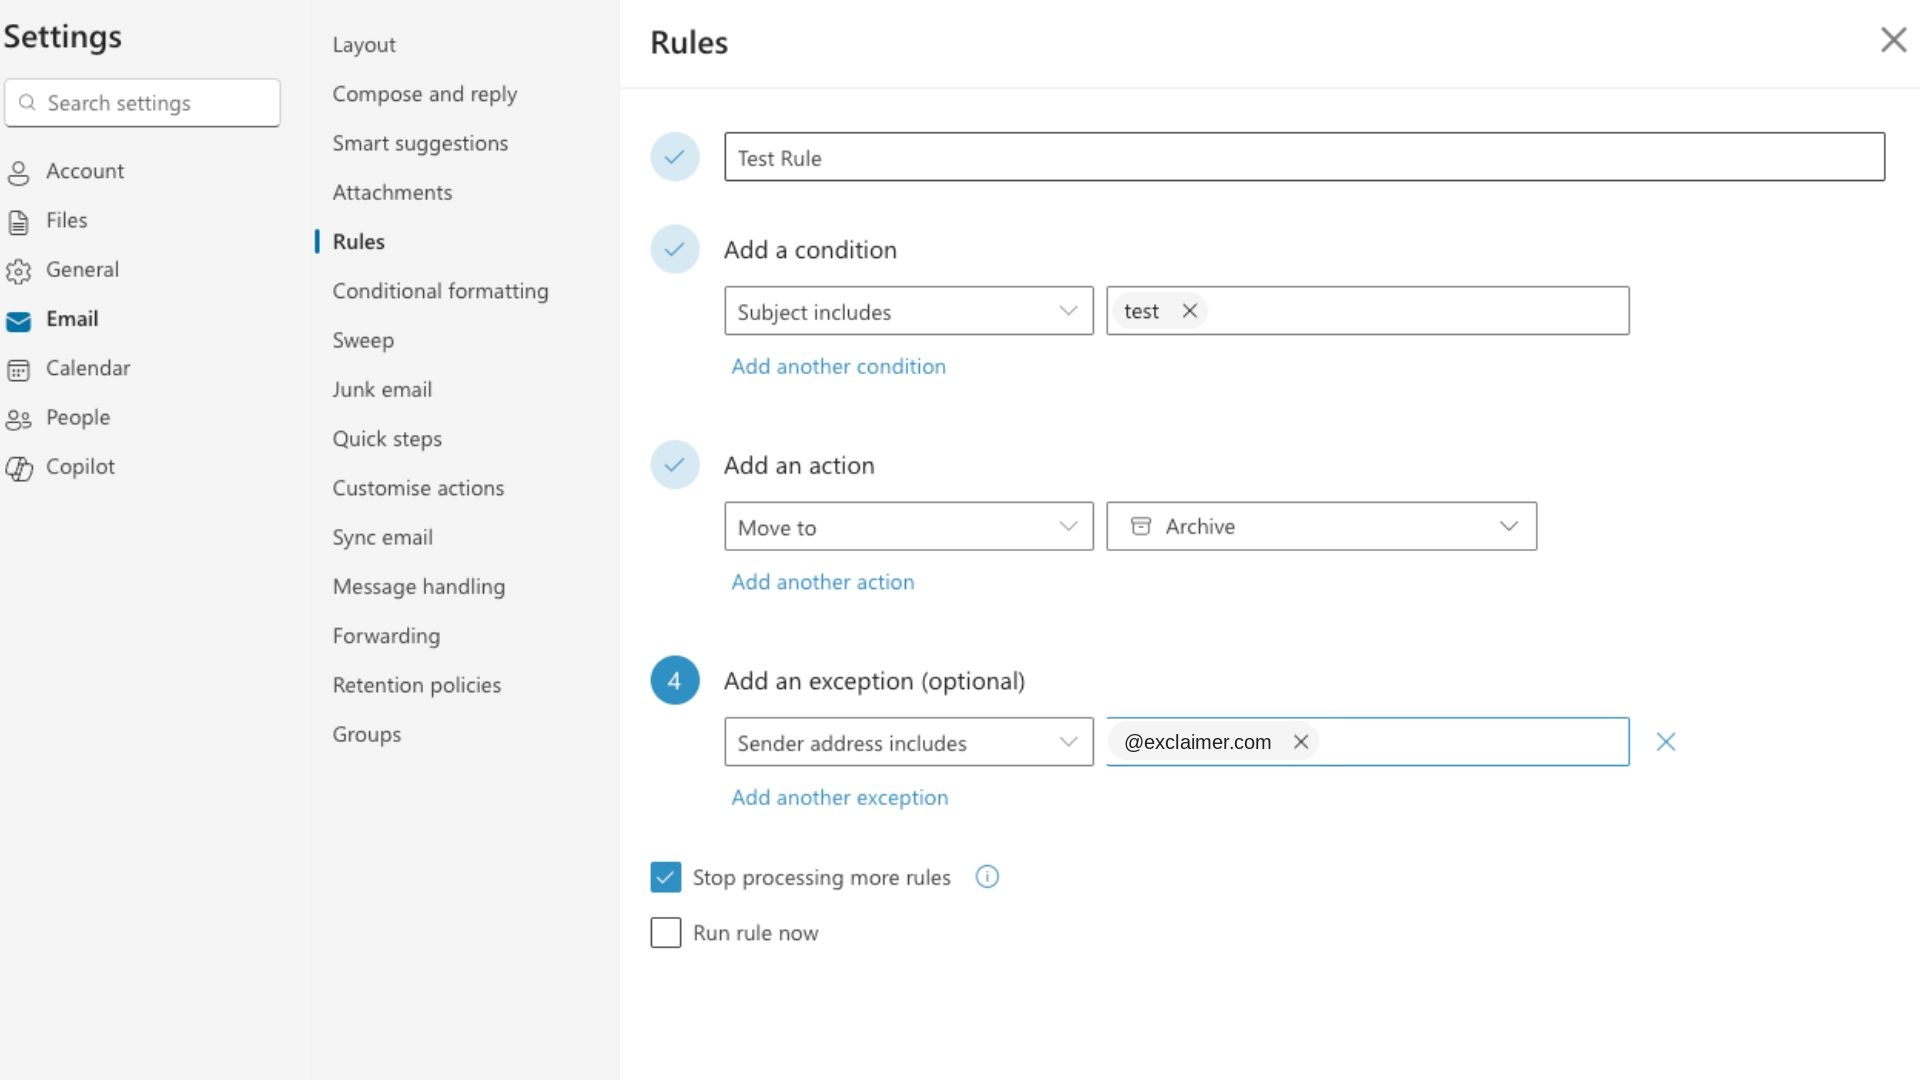
Set your preferred conditions and actions (e.g., move to a specific folder).
Click Save to apply the rule.
Outlook rules not working? Here's what to do
If you've created a rule in Outlook but it's not working as expected, there are a few things you can do to troubleshoot the issue:
Check that the rule is enabled: Make sure the checkbox next to your rule is selected in the "Rules and Alerts" window. If it's not, click on it to enable it.
Verify the conditions and actions: Double-check that you've set up the rule correctly and that all conditions and actions are exactly as you intended.
Clear old rules: If you have many outdated or conflicting rules, it can cause issues with your new rule. Try deleting unnecessary rules to see if this resolves the problem. You can also stop Outlook from applying multiple rules to messages using the steps below.
Stop Outlook applying multiple rules to messages
When you're using multiple Outlook rules to organize your inbox, things can potentially get messy. By default, Outlook will keep processing all matching rules for a single email. This can lead to unexpected results like duplicate actions, conflicting moves, or important messages being rerouted in ways you didn't intend.
To keep things tidy and ensure each message is handled just once, you can use the "Stop processing more rules" option. This tells Outlook to stop checking for other rules once a specific one has been applied.
Here's how to enable it:
Steps for Outlook Desktop (Windows & Mac)
Open Outlook and go to the Home tab.
Click on Rules > Manage Rules & Alerts.
Select the rule you want to modify and click Edit Rule (or Change Rule).
In the rule conditions, look for the option "Stop processing more rules" and check the box.
Click OK and then Apply to save the changes.
Steps for Outlook Web (Outlook.com & Microsoft 365)
Click the Settings (⚙) icon and select View all Outlook settings.
Navigate to Mail > Rules.
Select a rule and click Edit.
Toggle on "Stop processing more rules".
Click Save to update the rule.
Once enabled, Outlook will stop checking for additional rules once that specific rule has been applied.
The 10 best Outlook rules to improve your productivity
Now that you know how to create and troubleshoot Outlook rules, let's look at 10 of the most useful ones.
1. View rules applying to a mailbox
To understand which rules actively affect a specific mailbox, the Get-InboxRule cmdlet is a useful tool. It provides a list of all rules that are currently applied to any given mailbox:
Open the Exchange Management Shell. For Office 365 users, you'll need to use the Azure PowerShell module.
Type Get-InboxRule -Mailbox [email address], replacing [email address] with the actual email address of the mailbox you want to inspect.
Press Enter. You'll see a detailed list of all the rules currently applied to the mailbox you specified.
To get more detailed information about a specific rule, you can type "Get-InboxRule -Identity "RuleName" -Mailbox [email address]", replacing "RuleName" with the name of the rule you're interested in.
Browse through the list to understand which rules are active and check that their conditions and actions match your email management strategy.
2. Flag emails from important senders
To ensure emails from certain contacts that demand prompt attention are easily noticeable, you can establish a rule for flagging such messages for follow-up.
By implementing this rule, the emails will be marked with a red flag, making them more prominent in your inbox:
Create a new rule with the condition From and enter the email address of the sender.
For the action, choose Flag message for follow up and select your desired flag color, e.g., red.
3. Highlight emails with specific keywords
Improve your email management by creating a rule to highlight messages with specific keywords in the subject line. This helps track important emails or projects by making them stand out in your inbox for quick identification:
Create a new rule with the condition "Subject includes" and enter the keyword(s) you want to highlight.
For the action, choose Categories and select a color to highlight these emails.
4. Move emails from specific senders to designated folders
To sort emails from certain senders out of your main inbox, set up a rule to auto-move them to specific folders:
Create a new rule with the condition "From" and enter the email address of the sender.
For the action, choose Move message and select the folder where you want these emails to be moved.
Mark them as read or delete them automatically once they're moved, if you don't need to see them at all.
5. Send automatic replies during specific time periods
An automatic reply rule for your email can be created to send out-of-office responses during specific times, like being on vacation:
Create a new rule with the condition "Received in a specific date span" and enter the dates when you want the automatic reply to be sent.
For the action, choose have server reply using a specific message and enter your desired automatic reply message.
6. Clean up your inbox with a delete or move to archive rule
For those swamped with emails, automating the moving or deletion of old messages can keep your inbox tidy and organized, so important emails stay safe:
Create a new rule with the condition "Date received is greater than (insert number) days" and enter the number of days after which you want these emails to be deleted or moved.
For the action, choose "Delete" or Move to folder and select the designated archive folder.
Scope it further by sender, subject, or keyword if you don't want it applied inbox-wide.
7. Set up categories based on keywords
Categories in Outlook are a great way to visually organize your emails. You can create a rule to automatically assign categories based on specific keywords in the subject line or body of the email:
Create a new rule with the condition "Subject includes" and enter the keyword(s) you want to use for categorization.
For the action, choose Assign it to the category and select your desired category.
Set up a separate rule for each keyword set if you want more than one category applied automatically.
8. Removing or reducing attachments in emails
Large Outlook attachments can take up a lot of space in your mailbox, leading to slower performance.
To avoid this, you can create a rule that removes or reduces the size of attachments automatically:
Create a new rule with the condition "Size is greater than (insert number) KB" and enter the maximum attachment size you want to allow.
For the action, choose "Delete" or Move to folder, and select a designated folder for these emails.
9. Adding custom alerts for specific emails
If there are certain emails that you need to be notified about immediately, you can create an Outlook rule that sets up a custom alert for these messages:
Create a new rule with the condition "Subject includes" and enter the keyword(s) for the email you want to receive a custom alert for.
For the action, choose Display a Desktop Alert and enter your desired message.
10. Forwarding emails to specific recipients
If you get emails that need sharing, set up a rule to auto-forward them to chosen recipients, saving time and effort.
Create a new rule with the condition "Received from" and enter the email address of the sender.
For the action, choose Forward it to and enter the email address(es) of the recipient(s).
How to manage rules in Outlook
To manage your Outlook rules:
Go to the Home tab
Click Rules in the Move group.
From the dropdown menu, select Manage Rules & Alerts.
View, edit, delete, or reorder your existing rules.
You can also use the Get-InboxRule command in the Exchange Management Shell to view all rules applied to your mailbox.
How to edit an Outlook rule
To edit an Outlook rule, you can do one of the following:
Outlook desktop app
Go to the Home tab
Click Rules in the Move group.
From the dropdown menu, select Manage Rules & Alerts.
Find the rule you want to edit.
Select Change Rule > Edit Rule Settings.
Make changes to the conditions or actions as desired.
Click Finish to save your changes.
Outlook 365 and Outlook.com
Select Settings at the top of the page
Select Mail > Rules.
Find the rule you want to edit.
Select Edit for the rule you want to change.
Make changes to the conditions or actions as desired.
Click Save to save your changes.
How to delete an Outlook rule
To delete an email rule in Outlook, follow these steps:
Open Outlook and click on File in the top left corner.
Select Manage Rules & Alerts.
Choose the rule(s) you wish to delete and highlight them.
Click on the Delete icon to remove the rule.
You can also use the Remove-InboxRule command in the Exchange Management Shell to delete specific rules.
How to export an Outlook rule
To export an Outlook rule:
Open Outlook.
Click on File > Manage Rules & Alerts.
Select Options.
Click on the Export Rules... button under the Export section.
Choose a location to save your file and give it a name.
Click Save to complete the export process.
How to import an Outlook rule
To import an Outlook rule:
Open Outlook.
Click on the File > Manage Rules & Alerts.
Select Options.
Click on the Import Rules... button under the Import section.
Choose the rules you want to import and click Open.
Select OK > Apply to complete the import process.
Can Outlook rules manage email signatures and disclaimers across your organization?
No. Outlook rules run one mailbox at a time, so nothing about them guarantees the same email signature, disclaimer, or brand look on every message your organization sends.
The rest of this section covers why, and what closes the gap.
Why a mailbox-level rule doesn't scale into governance
Quick answer
This is specifically about the Rules and Alerts automation covered above, not Outlook's built-in email signature settings. Outlook vs. Microsoft 365 for email signature management covers that comparison in full.
A rule you build for your own inbox does exactly one thing. It acts on mail passing through that mailbox. It doesn't propagate to a new starter's mailbox; it doesn't update itself when someone changes role or leaves; and it doesn't render the same way in desktop Outlook, Outlook on the web, and mobile.
Now, let's multiply that by every employee. Two people on the same team can end up with different disclaimer wording or no email signature at all. And IT has no single place to check that against.
That gap between centralized infrastructure and decentralized configuration is a known pattern, not a hypothetical one:
"The shift to SaaS didn't create this issue, but it has amplified it. As infrastructure moved into cloud platforms like Microsoft 365 and Google Workspace, control over how communication is configured moved in the opposite direction. The result is a situation in which infrastructure is centralized, but configuration is not. And that gap is where inconsistency, risk, and operational friction begin to surface."

How few organizations centralize this today
Only 18% of US organizations manage email signatures centrally today. The rest rely on manual per-employee setup, admin-level workarounds, or leave it to employees entirely (Exclaimer's State of Business Email 2025 report).
Outlook's personal Rules and Alerts don't actually factor into that split. That's because the classic rule engine was never built to touch email signatures or disclaimers at all. Its actions cover moving, flagging, forwarding, and sending a fixed auto-reply to messages that match specific conditions (rule 5, above), but none of them append an email signature or disclaimer to every message someone sends the way governance requires.
The org-wide equivalent, an Exchange mail flow rule configured by an admin rather than an individual user, is a different feature. But even that comes with a real trade-off, which is that it can only really add a uniform disclaimer with little design flexibility.
Outlook rules vs. centralized email signature management
A rule configured in one inbox and a policy enforced from one platform behave differently at every stage, from initial setup through to who's allowed to change what:
Outlook rules (per mailbox) | Centralized email signature management | |
|---|---|---|
Where it lives | Inside each individual mailbox | One central platform covering the organization |
Setup per employee | Manual, rule by rule | Automatic, based on directory data |
New starters and leavers | Rules recreated by hand each time | Applied automatically from Microsoft Entra ID |
Consistency across devices | Varies by client (desktop, web, mobile) | Applied server-side, so it's consistent everywhere |
Who can update it | IT, one rule at a time | IT retains governance; Marketing, HR, or Legal can update their own content within permissions |
Outlook rules and centralized email signature management aren't competing for the same job. Rules are still the right way to sort, flag, and auto-reply inside your own inbox.
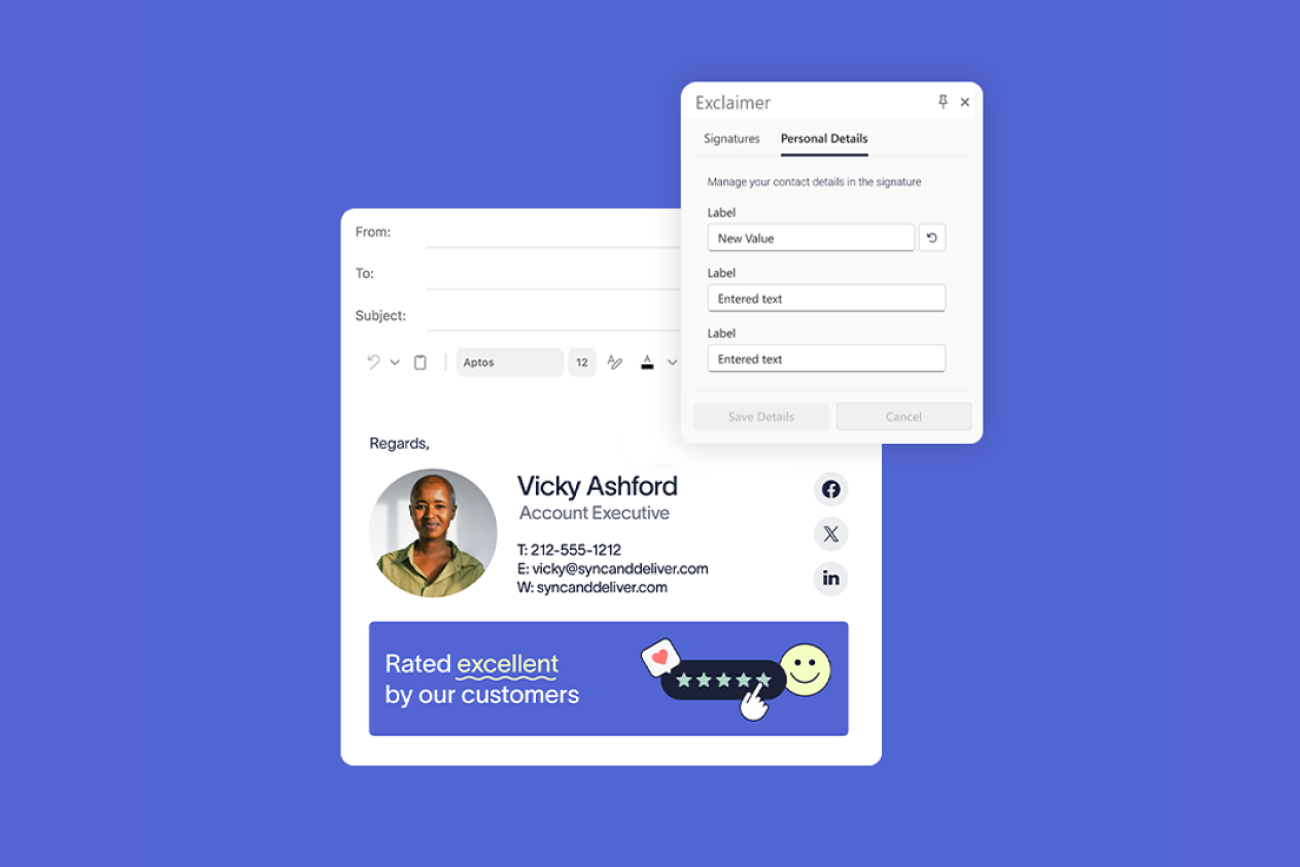
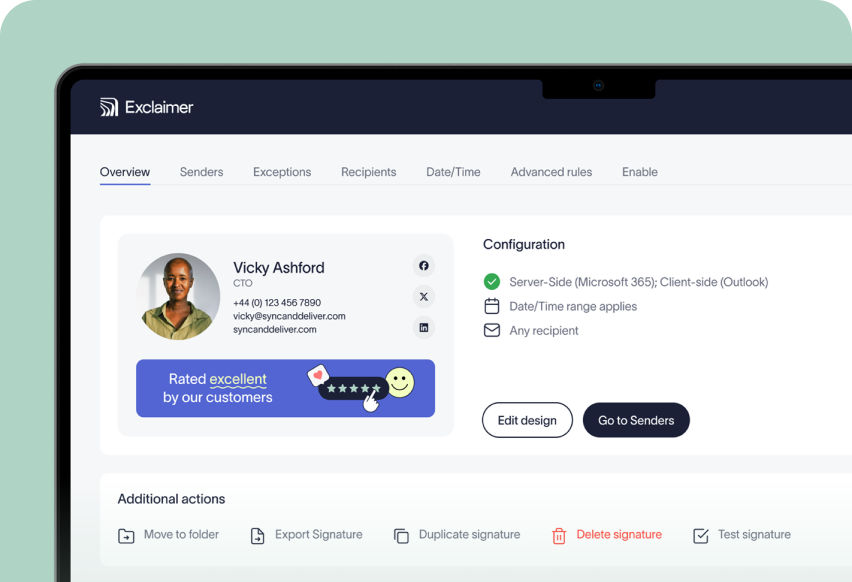
Email signature and disclaimer consistency across the whole organization is a different problem that needs to be solved once, centrally. That's what Exclaimer's Microsoft 365 solution does. It applies email signatures server-side, so they look the same on every device and client without IT touching every mailbox, and it updates automatically as Microsoft Entra ID data changes.
Discover how Exclaimer can enhance your email communications by scheduling an online demo or engaging in an interactive product tour today.